I am the only vegetarian in my family (for now) so I often have to make a separate meal for myself, and I often try to make a comparable meal to what the rest of my family is having. So when they were having homemade chicken pot pie, I decided to attempt to make my own.
I didn’t Google any recipes for this one, I just decided to see what I could come up with on my own. So while at the store getting the pre-made pie crusts for their meal, I looked for what I could use as the crust for mine. I knew I wanted to make mine in a muffin tin, so biscuits seemed to be the best option. I found some little biscuits in a miniature version of those exploding tubes (you know the ones) and thought they would be perfect. There were some made by the leading brand, but being the frugal shopper I am, I opted to go with the store brand which was about half the price. There were five mini biscuits in each tube, so I grabbed two. I already had the rest of the needed ingredients on hand, so I headed home to get started.
This recipe couldn’t be any easier, and it comes together so quickly you can make it any night of the week. Also, the results are so pretty you could certainly serve these to any guests at your dinner table. Give it a try and let me know what you think. I’m pretty sure you’re going to love this one.
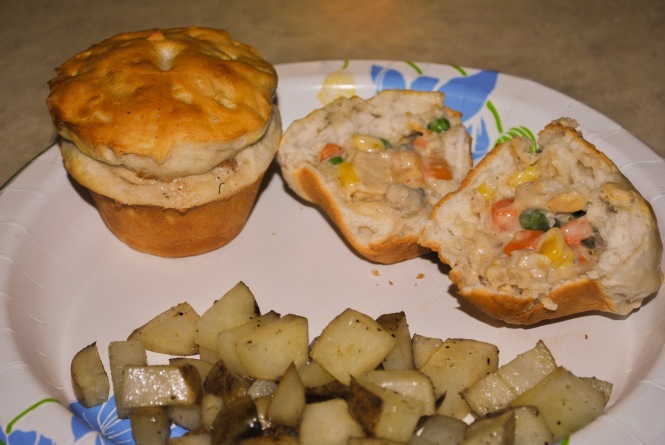
Mini “Chick’n” Pot Pies
Yields 5 individual pies
Ingredients
2 cans refrigerated mini flaky biscuits
1 cup vegetarian chick’n pieces or strips (any brand)
1 cup frozen mixed vegetables
1/2 can cream of mushroom soup
1 Tbsp olive oil
1/2 tsp garlic powder (or to taste)
salt and pepper to taste
Directions
- Heat oil in a skillet over medium heat.
- Add chick’n pieces and heat until no longer frozen.
- Add garlic powder, salt, and pepper.
- Add frozen vegetables and heat until no longer frozen.
- Add cream of mushroom soup and heat until warm.
- Open biscuits. Stretch one mini biscuit slightly, place it in the bottom of an ungreased muffin tin and press up the sides. Repeat with half of the biscuits.
- Fill each biscuit cup to the top with the chick’n and vegetable filling.
- Top each biscuit cup with another biscuit, stretching slightly and pressing along the edge to seal.
- Poke the top of each biscuit with the point of a sharp knife to allow steam to escape.
- Bake in oven for time and temperature specified on biscuit can, or until golden brown.